
Sending stays off while you prepare. Nothing goes out until you select Start sending on the campaign’s Overview tab. The button stays greyed out until the campaign passes its readiness checks.
Before you start
- Connect the email account or LinkedIn account you want to send from.
- Make sure the people you plan to add have the contact detail each channel needs: an email address for email steps, a LinkedIn profile for LinkedIn steps.
- Decide whether the campaign is for candidate sourcing or business development.
1. Create the campaign
- Open Campaigns from the main navigation.
- Select New campaign.
2. Add people
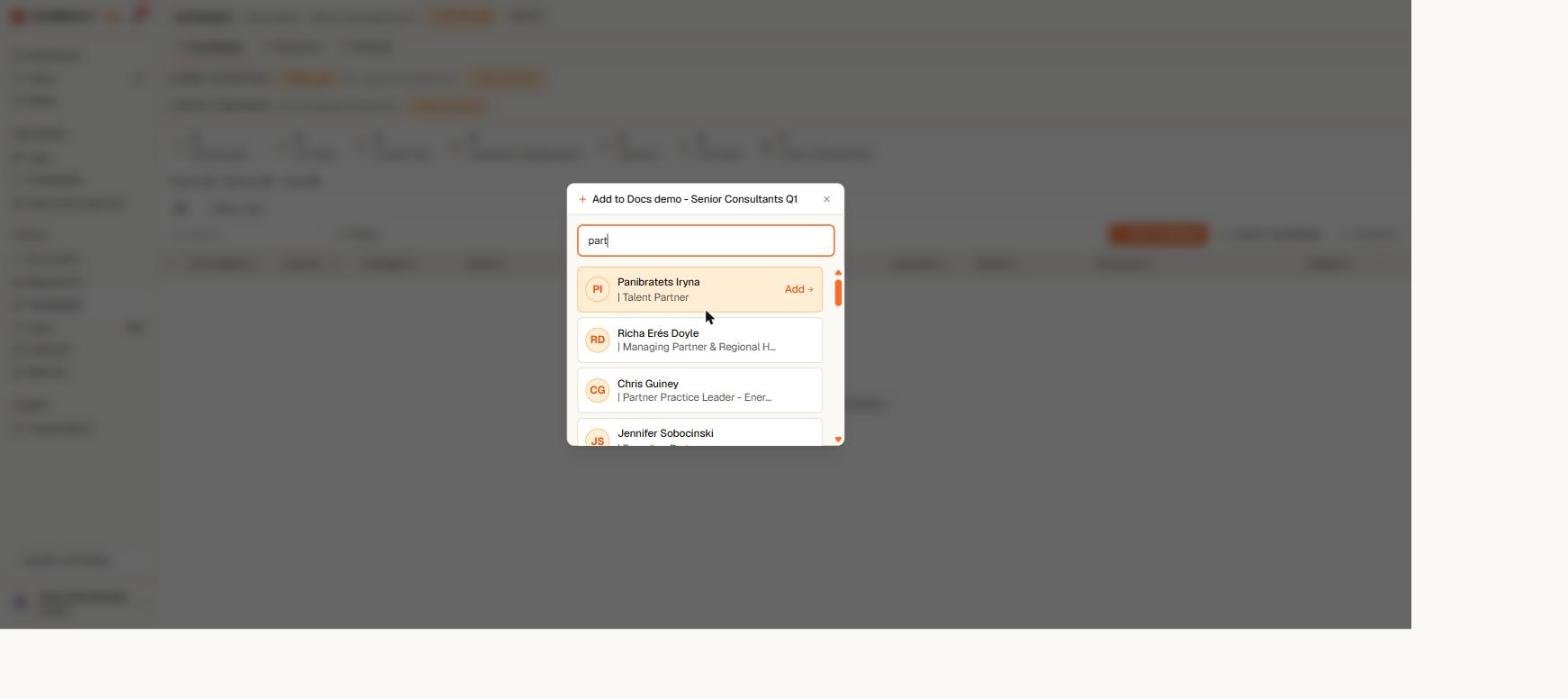
Add people to a campaign from any list in Yena
3. Build the sequence
Open the Sequence tab and add your steps in order. Each follow-up waits a number of days and hours after the previous step. See Build your sequence for step types, timing, and personalization.4. Set the sender and delivery window
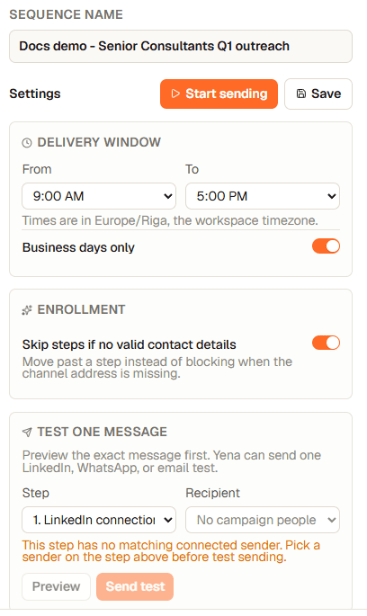
Choose who sends and when messages are allowed to go out
- Choose the From and To hours. Yena shows your workspace timezone next to the window.
- Keep Business days only on unless the campaign genuinely needs weekend delivery.
- Decide whether steps with missing contact details should be skipped for that person, or should hold their journey.
- Select Save.
5. Check readiness and preview

The setup progress strip names exactly what is still missing
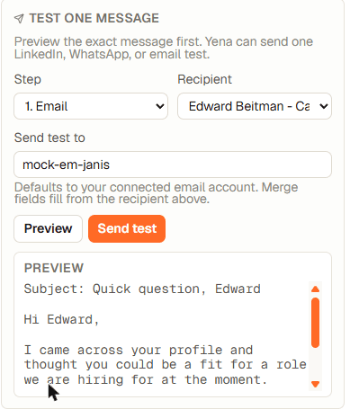
Preview the exact rendered message before anything is sent
6. Turn sending on
Open the campaign’s Overview tab, check who goes out first under Next up, then select Start sending. Yena confirms how many people will start, then works through the sequence inside your delivery window. To stop, select Pause sending on the Overview, or switch Sending off in the campaign’s row on the Campaigns page. No further steps are sent. Already-sent messages and invitations cannot be recalled. Details, and how to resume: Review who goes out, then start or pause.While sending is on, the sequence is read-only. Pause the campaign first if you need to change a step — this protects people mid-journey from being moved onto a half-edited sequence.
7. Watch it run
The Overview tab shows the campaign numbers: the progress line, sends and replies over the last 7 days, the counts per step, and the latest activity. It counts only real, confirmed sends. The People tab shows a live, per-person status — what happened last and what happens next, with the exact time. See Track progress and replies.8. Handle replies
When someone replies — on LinkedIn or by email — Yena immediately takes them out of every campaign, cancels their remaining steps, marks them Replied, and notifies you. The conversation is waiting in Inbox; from there on it’s you, not the sequence.Troubleshooting
- A person is “waiting”: check their status line in the Candidates tab — it names the reason: not due yet, outside the delivery window, today’s limit reached, or waiting for an invitation to be accepted.
- A LinkedIn follow-up has not sent: it waits for the connection to be accepted. Yena checks acceptance automatically; the follow-up delay starts from the moment they accept.
- A LinkedIn message was skipped as “not connected”: the sequence is set to People you can already message and this person is outside your network. Add a connection request step instead. See How a LinkedIn campaign reaches people.
- Start sending is greyed out: hover it to see why. The line under the button names what is missing and links to the place to fix it.
- A message looks wrong: turn sending off, correct the sequence, preview again, then resume.