Create a portal workspace for the client, choose exactly which candidates they see, and collect approve/decline feedback.
The client portal replaces the PDF-by-email ritual. Your client gets a branded page where they review the candidates you chose to present, and their feedback lands back in Yena.
1
Create the portal from the job
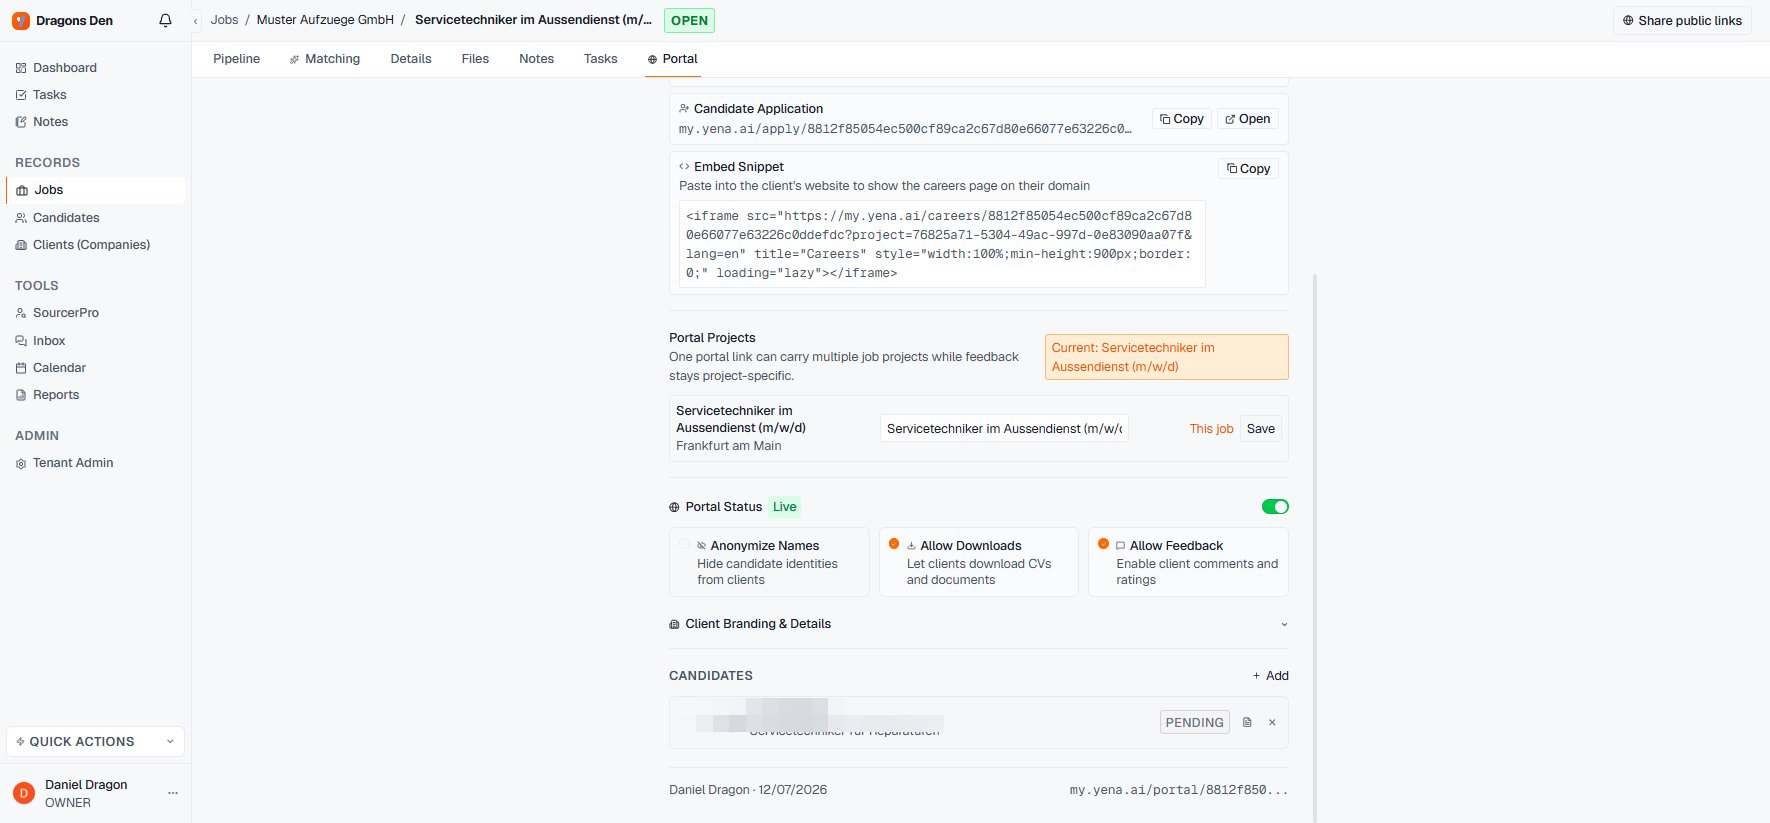
On any job, open the Portal tab and create the portal workspace. One portal link can carry several job projects for the same client while feedback stays project-specific.
2
Choose who the client sees
Your pipeline is internal. In the portal’s Candidates section, click + Add and pick from your pipeline candidates: only the people you select are presented.You can skip this step entirely: candidates who reach a presentation stage in your pipeline (Longlist or Shortlist by default) join the portal automatically. Which stages count is set under Tenant Admin → Client Portal → Client presentation stages. Moving someone out of the stage never removes them from the portal — removal stays your deliberate act.For clients who want to follow the whole search rather than approve a curated set, switch the portal to live pipeline sharing: every candidate on the job, at their real stage, in the stages you allow.
Select pipeline candidates to present
3
Set the rules
Toggles control the experience: Anonymize Names (hide identities, useful pre-contract), Allow Downloads (CVs and documents), Allow Feedback (comments and ratings). Client branding and details are configurable, and the portal can be taken offline with one switch.
4
Send the link
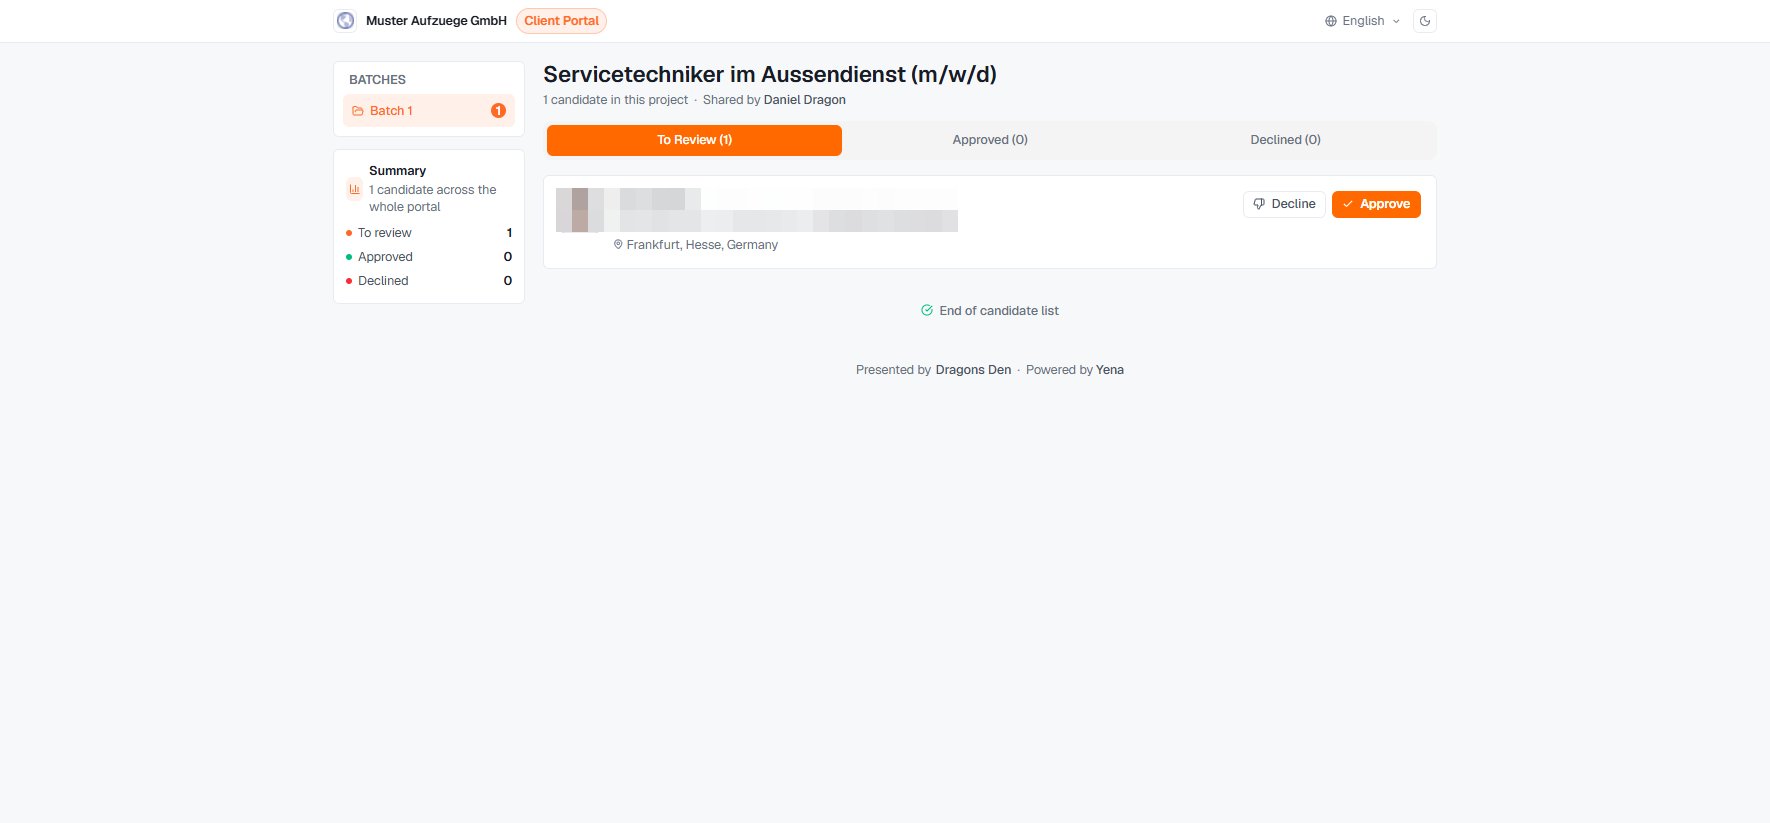
Copy Link and send it. The client sees the shortlist with Approve / Decline on every candidate, batch by batch, in their language (the portal has its own language switcher).
What your client sees: review, approve, decline
The job header also has Share public links and Manage Access for controlling who reaches the portal. Candidate and view counters on the Portal tab show whether the client has actually looked.