> ## Documentation Index
> Fetch the complete documentation index at: https://support.yena.ai/llms.txt
> Use this file to discover all available pages before exploring further.
# Start a campaign from a job
> One click on a job creates a complete six-step candidate campaign, written from the job itself, in the job's language. You review, you switch sending on.
## The problem this solves
A recruiter opens a job on Monday, has a shortlist by Tuesday, and then loses an afternoon writing a connection request, three emails and two LinkedIn messages before the first person is contacted. Most of that writing is the same every time: who you are, what the role is, where it is, why it is worth a conversation.
Yena now writes that first draft for you, from the job you already entered. You keep the last word on every sentence, and nothing goes out until you switch sending on.
## One click on the job
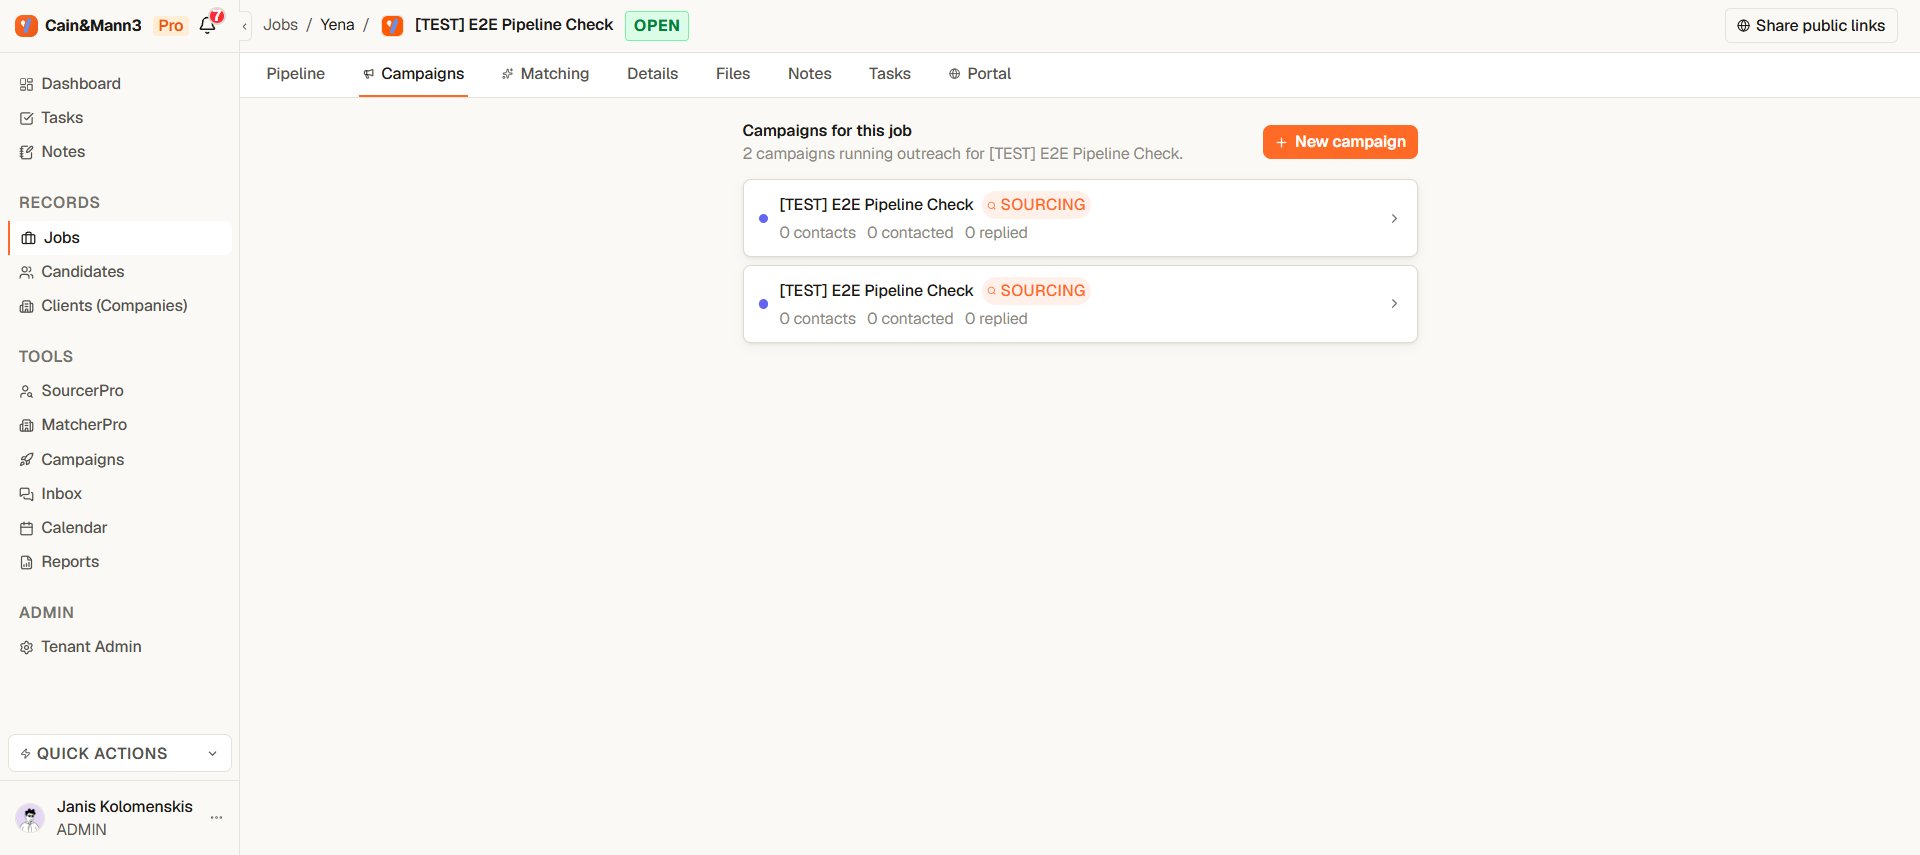 1. Open the job and select the **Campaigns** tab.
2. Select **New campaign**.
There is no form. Yena names the campaign after the job, links it to the job and its company, builds the sequence, and opens it. The same happens when you pick **Add to campaign** on a Sourcer slate and choose the job.
## What you get
1. Open the job and select the **Campaigns** tab.
2. Select **New campaign**.
There is no form. Yena names the campaign after the job, links it to the job and its company, builds the sequence, and opens it. The same happens when you pick **Add to campaign** on a Sourcer slate and choose the job.
## What you get
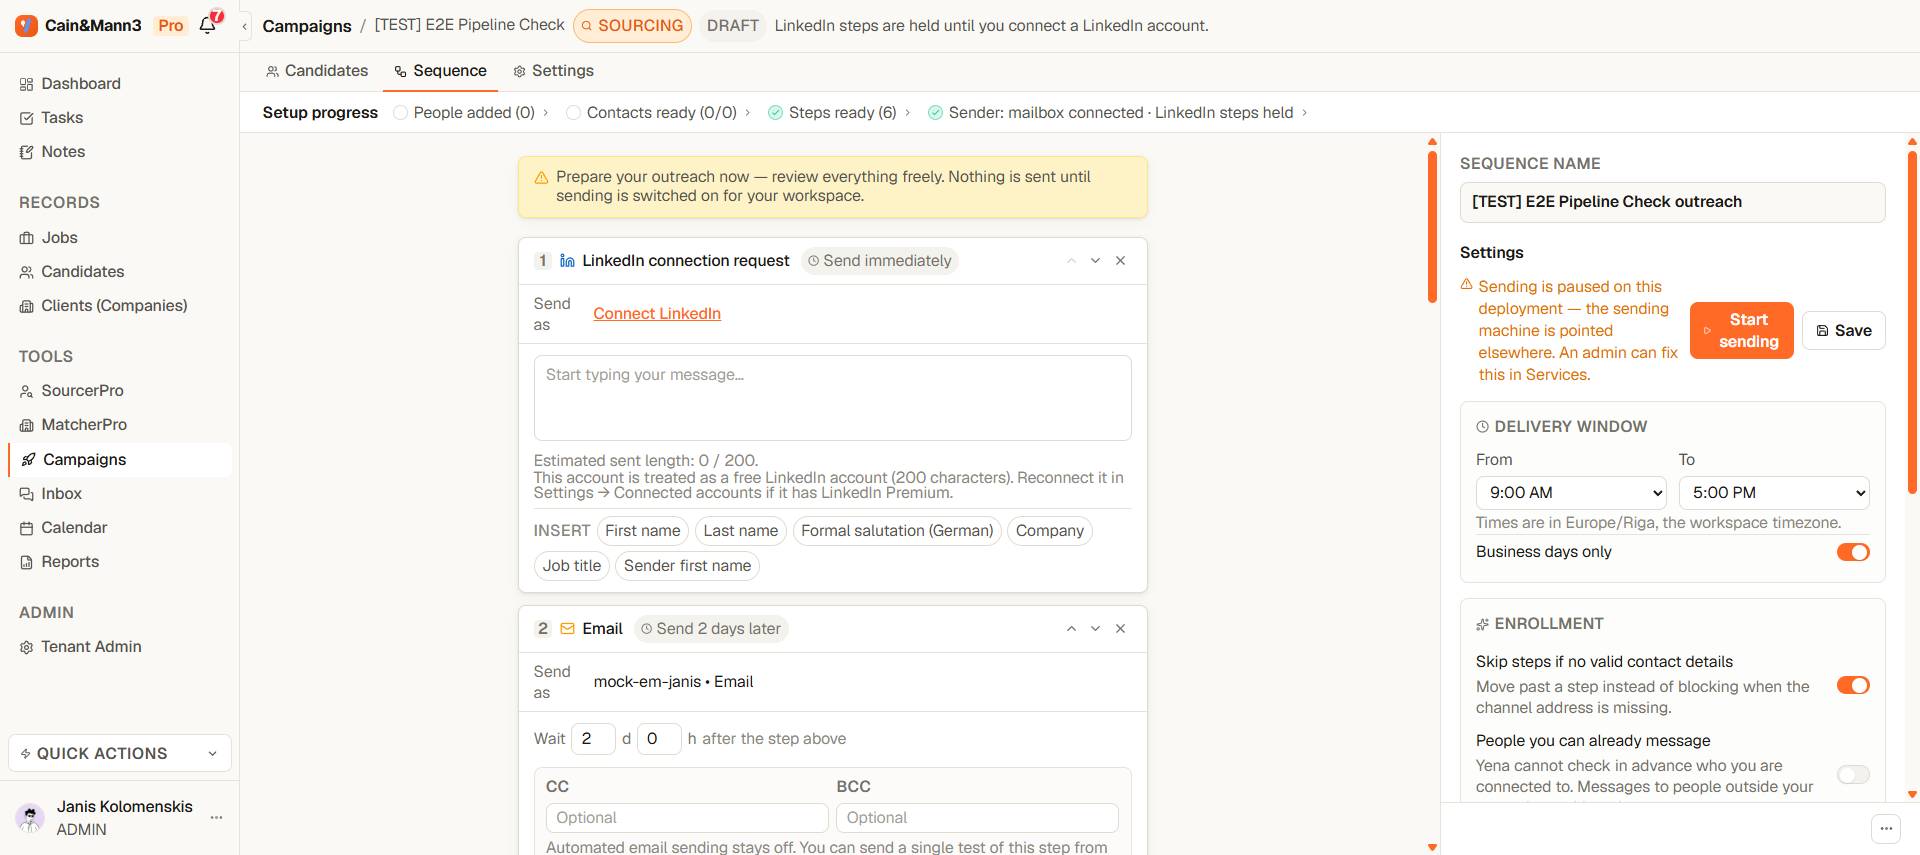 The sequence always has the same six steps. LinkedIn first, then email and LinkedIn take turns, about two weeks in all:
| Step | Channel | When |
| - | - | - |
| 1 | LinkedIn connection request, no note | Immediately |
| 2 | Email | 2 days later |
| 3 | LinkedIn message | 3 days later |
| 4 | Email | 4 days later |
| 5 | LinkedIn message | 3 days later |
| 6 | Email | 4 days later |
Every message is filled in. The text uses the job title, the company, the location and the facts in the job description. It never invents a fact that is not in the job, and it never uses a candidate's own data: personalization comes from the six insert fields, so **First name** and **Formal salutation (German)** are filled per person at send time.
**Language.** If the job text is mostly German, the sequence is written in formal German (Sie). Otherwise it is English. If Yena cannot tell, it uses your workspace language.
**Sender.** If you have exactly one connected LinkedIn account and one mailbox, they are set on the steps. Otherwise the step says **Connect LinkedIn** or **Choose a sender**, and the setup strip names what is missing.
## The rules built into the sequence
* **A reply ends everything.** Any reply, on any channel, takes the person out of the campaign. The remaining steps are cancelled.
* **Not accepted within 7 days: move on by email.** If the connection request is not accepted after seven days, that step is skipped and the person continues with the email steps. The LinkedIn messages wait for an acceptance and are skipped if it never comes.
* **Already connected: no request.** If the person is already a first-degree connection, the request is skipped and the messages go straight through.
* **Unanswered requests are withdrawn after 30 days.** Too many open requests can get a LinkedIn account restricted. You can change the number of days, or turn this off, in the sequence settings.
## Review before you start
Read the six messages the way the candidate will. Change any sentence. Use **Test one message** to see one step rendered for one real person. Then switch sending on: the same readiness checks apply as for any campaign, so a missing sender or an empty step blocks the start and says why.
Add people first, then read the messages once more with a real name in mind. A sentence that reads well in the editor can land differently for a candidate two levels above the role.
## Read the campaign from the steps
Once the campaign runs, every step card ends with one line: **N people waiting here · N sent · N replied after**. Below the last step: **N people finished all steps**. Each number is a link. Select it and the **People** tab shows exactly those people; **Show all** clears the filter.
"Replied after" credits the step that was sent last before the person answered. It is the fastest way to see which message does the work.
## Where to go from here
* [Build your sequence](/en/campaigns/build-your-sequence) for step types, timing and the six insert fields.
* [How a LinkedIn campaign reaches people](/en/campaigns/how-a-linkedin-campaign-reaches-people) for why the request comes first.
* [Sending limits and account safety](/en/campaigns/sending-limits-and-safety) for daily pacing.
The sequence always has the same six steps. LinkedIn first, then email and LinkedIn take turns, about two weeks in all:
| Step | Channel | When |
| - | - | - |
| 1 | LinkedIn connection request, no note | Immediately |
| 2 | Email | 2 days later |
| 3 | LinkedIn message | 3 days later |
| 4 | Email | 4 days later |
| 5 | LinkedIn message | 3 days later |
| 6 | Email | 4 days later |
Every message is filled in. The text uses the job title, the company, the location and the facts in the job description. It never invents a fact that is not in the job, and it never uses a candidate's own data: personalization comes from the six insert fields, so **First name** and **Formal salutation (German)** are filled per person at send time.
**Language.** If the job text is mostly German, the sequence is written in formal German (Sie). Otherwise it is English. If Yena cannot tell, it uses your workspace language.
**Sender.** If you have exactly one connected LinkedIn account and one mailbox, they are set on the steps. Otherwise the step says **Connect LinkedIn** or **Choose a sender**, and the setup strip names what is missing.
## The rules built into the sequence
* **A reply ends everything.** Any reply, on any channel, takes the person out of the campaign. The remaining steps are cancelled.
* **Not accepted within 7 days: move on by email.** If the connection request is not accepted after seven days, that step is skipped and the person continues with the email steps. The LinkedIn messages wait for an acceptance and are skipped if it never comes.
* **Already connected: no request.** If the person is already a first-degree connection, the request is skipped and the messages go straight through.
* **Unanswered requests are withdrawn after 30 days.** Too many open requests can get a LinkedIn account restricted. You can change the number of days, or turn this off, in the sequence settings.
## Review before you start
Read the six messages the way the candidate will. Change any sentence. Use **Test one message** to see one step rendered for one real person. Then switch sending on: the same readiness checks apply as for any campaign, so a missing sender or an empty step blocks the start and says why.
Add people first, then read the messages once more with a real name in mind. A sentence that reads well in the editor can land differently for a candidate two levels above the role.
## Read the campaign from the steps
Once the campaign runs, every step card ends with one line: **N people waiting here · N sent · N replied after**. Below the last step: **N people finished all steps**. Each number is a link. Select it and the **People** tab shows exactly those people; **Show all** clears the filter.
"Replied after" credits the step that was sent last before the person answered. It is the fastest way to see which message does the work.
## Where to go from here
* [Build your sequence](/en/campaigns/build-your-sequence) for step types, timing and the six insert fields.
* [How a LinkedIn campaign reaches people](/en/campaigns/how-a-linkedin-campaign-reaches-people) for why the request comes first.
* [Sending limits and account safety](/en/campaigns/sending-limits-and-safety) for daily pacing.